
Installing the app
Hierarchies for Jira is available on the Atlassian Marketplace. Install it like any other Jira app:
- Go to Apps → Find new apps in your Jira instance
- Search for “Hierarchies for Jira”
- Click Install and follow the prompts
The app requires no additional setup after installation — it auto-configures when first installed. If you’re upgrading from the Connect version, see the Migration Guide.
What the app adds
After installation, you’ll see two new entry points in Jira:
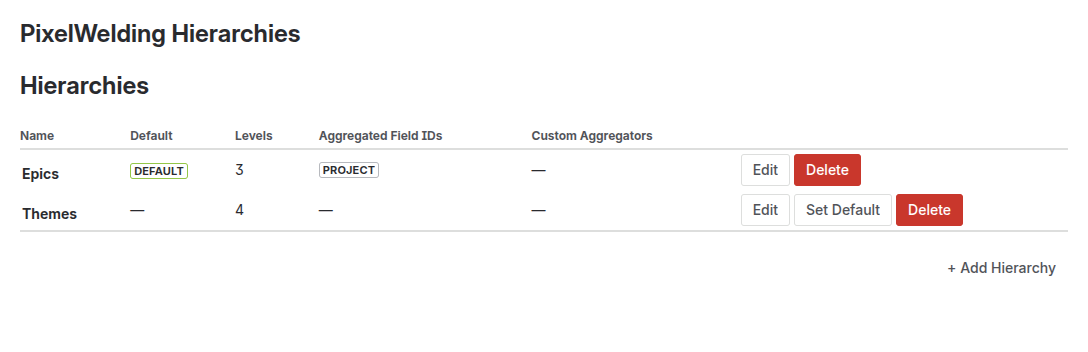
- Admin page — Found under Apps → Manage your apps → Hierarchies (left sidebar). Use this to configure hierarchies, custom aggregators, and trigger syncs.
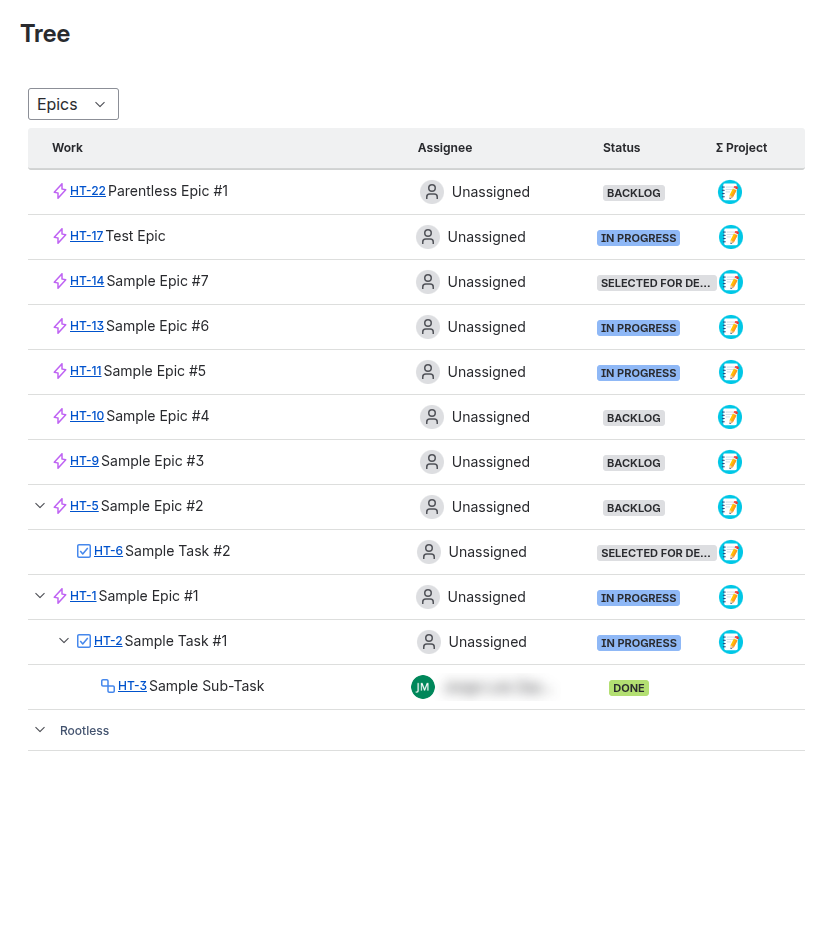
- Project page — The Tree tab appears on every project’s sidebar. This is where you and your team view and interact with the hierarchy.
First-time setup
On first install, the app seeds an initial configuration for sites that had the previous Connect version. If you’re setting up fresh:
- Go to the admin page
- Create your first hierarchy with the levels that match your workflow
- Trigger a full sync to populate parent-child relationships across all existing issues
Permissions
The app requires the following Jira permissions (managed automatically by Atlassian):
- Read and write issue data (to manage hierarchy properties)
- Read and write issue properties (to store parent-child relationships and aggregated values)
- Read project and issue type metadata (to configure hierarchy levels)
No additional user permissions are needed — all users with access to a project can view its hierarchy tree.
Next steps
- Configure your hierarchy — Define levels, link types, and issue types
- Learn the tree view — Understand how to navigate and interact with your hierarchy